

How To Replace Faces In Photoshop Cc 2018
Face up swap is a fun technique for any Photoshop experts, fifty-fifty for magazines, Hollywood studios, Commercial Photographers, and eCommerce or online sellers are likewise able to perform pattern magic by replacing one face or design element for another using Photoshop swap and blend technique.
In this tutorial, nosotros'll show you the step-by-step process for this widely used Photoshop confront swap and blend technique.
eleven steps to learn bandy faces and blend technique in Photoshop CC
- Open the 1st woman prototype in Photoshop CC
- Draw a selection using Lasso Tool
- Re-create the selection area
- Paste the copied area in next epitome
- Reduce opacity to l% for a better view
- Ready both faces to swap perfectly
- Back opacity to 100%
- Indistinguishable the layer and rename
- Make a choice of 1st image and contract
- Delete the 2d woman'due south face backside the 1st woman's face
- Utilise blending technique to swap the face
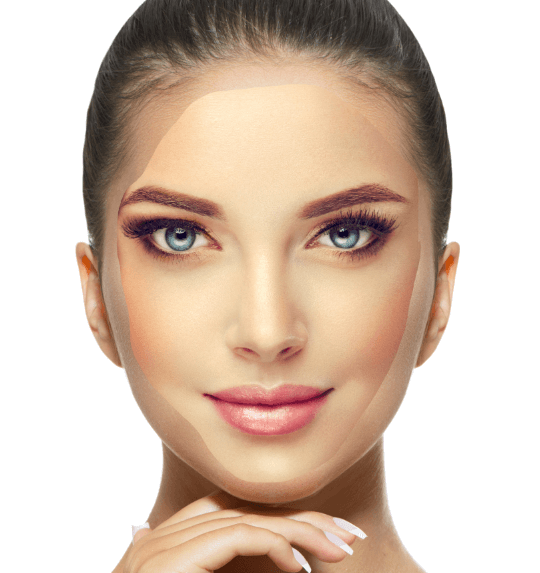
1: Open the 1st woman image in Photoshop CC
Open up the 1st woman prototype in Photoshop CC from which you desire to copy the confront and blend with 2nd woman's face to swap.

2: Draw a selection using Lasso Tool
For this tutorial, nosotros'll utilize the image of a 1st woman'southward face and swap information technology out for a 2nd woman's face, only you can utilise this technique to manipulate images of all kinds.

Outset, click on the Lasso Tool inside Photoshop and draw a selection around the human'due south confront, oral cavity and nose surface area. The pen tool tin exist used for this pick by cartoon a clipping path to cutting out the confront. Make sure to include any creases on the person'southward face, like near the mouth or olfactory organ.
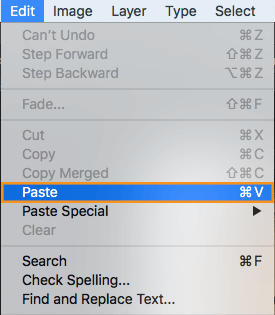
3: Copy the selection surface area
Now go to the edit option from menu bar, scroll downwards and click on 'copy' or printing CTRL+C on the keyboard to copy the pick.

4: Paste the copied area in next image
Next, open the image of the 2nd woman photo, become to edit menu, scroll downward and click on 'paste', or press CTRL+P to paste your selection onto the second image which is your destination prototype for the face swap.
5: Reduce opacity to 50% for a better view
Y'all need to reduce opacity of the copied area so that you can friction match eyes, nose and other face function and resize perfectly. To practice that go to the layers console and change the Opacity to 50%.

Related content: Learn how to outsource your photo editing chore
half-dozen: Ready upwardly both images to swap perfectly
Click on the new layer to suit. Printing 'V' on the keyboard to switch to the Motion Tool. Motion the image up and press CTRL+T. Discover the pivot bespeak and drag it over to the 2d adult female'southward middle, which you should exist able to see in the groundwork. And so marshal the 1st woman'south eye directly on top of the 2nd adult female's heart and so that the face swap will look natural.

Click the handle in the upper right corner and concur down both the Shift and ALT keys while dragging the image to scale down, fitting it inside the man's confront. To line up the heart and the mouth, go back to the corner, click and drag up to adjust for any tilt in the face up.
7: Back opacity to 100%
Click and elevate the other handles to make sure the face yous have imported fits perfectly on the new face. Click enter on the keyboard and bring the Opacity back up to 100%. Yous may notice that the skin of the 1st woman i southward not covering any hair on the 2d woman'south face.
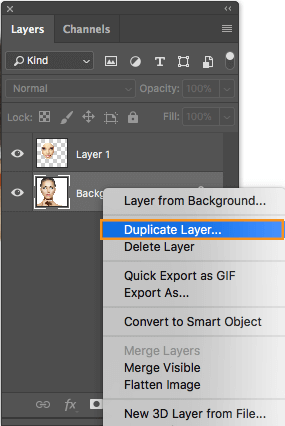
8: Indistinguishable the layer and rename
Next, click on the background image and and then click right push, or press CTRL+J to indistinguishable the layer. Rename the duplicate layer 'woman face'.
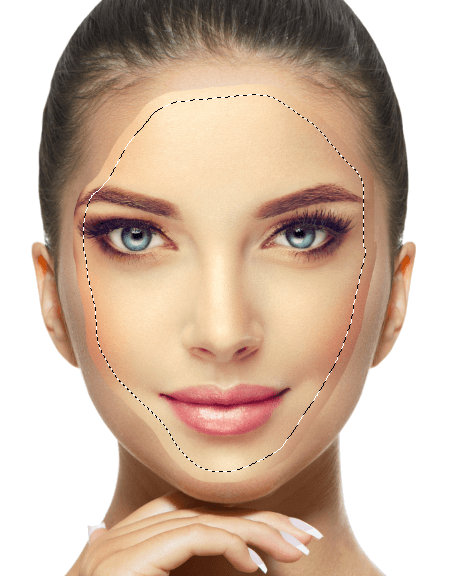
9: Brand a choice of 1st image and contract
In the adjacent step you will terminate accessibility to the background. Go to the thumbnail and click CTRL on the layered thumbnail, which will select the 1st adult female's face up. Cull Select, Modify, and Contract on the 2d woman's face. When the Contract box comes upward, enter 'x pixels.'
Note: The pixels may differ for different file size.
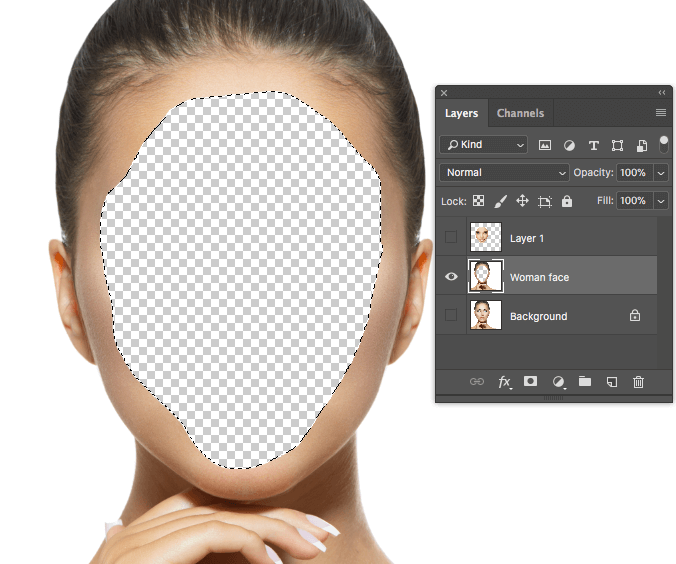
ten: Delete the 2nd woman'south face up behind the 1st woman's face
Hold the ALT cardinal while using the mouse to zoom in on your paradigm. You may notice that the selection is no longer at the edge of the picture. To remove the visibility of the 1st adult female'due south face, click on the 'woman face' layer and printing backspace to delete those faces.
Related content: Larn how to make product photos SEO friendly and boos ranking
11: Use blending technique to swap the face
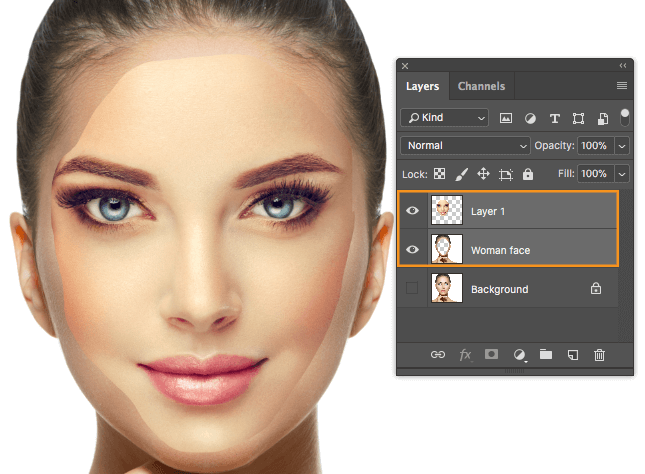
You're nearly done! Start this terminal process past clicking on the tiny box to the left of the 1st layer to bring the woman's face dorsum. Zoom out past holding the ALT key and scrolling out, using the mouse wheel. Then printing CTRL+D to deselect.
Select both layers by holding the shift key and clicking on both layers.
Cull edit and select Auto Blend Layers.
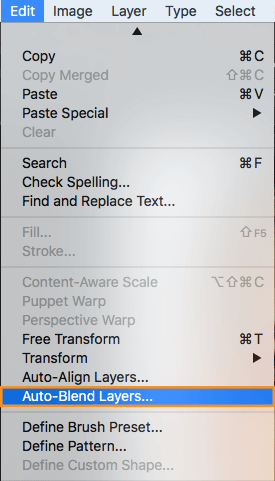
When the Car Blend Layers window opens, make certain that Panorama is selected, Seamless Tones and Colors is checked, and printing OK.

You've at present gone experienced the magic of Photoshop to swap faces, which blended the ii layers together perfectly past automatically matching the peel tones together seamlessly.
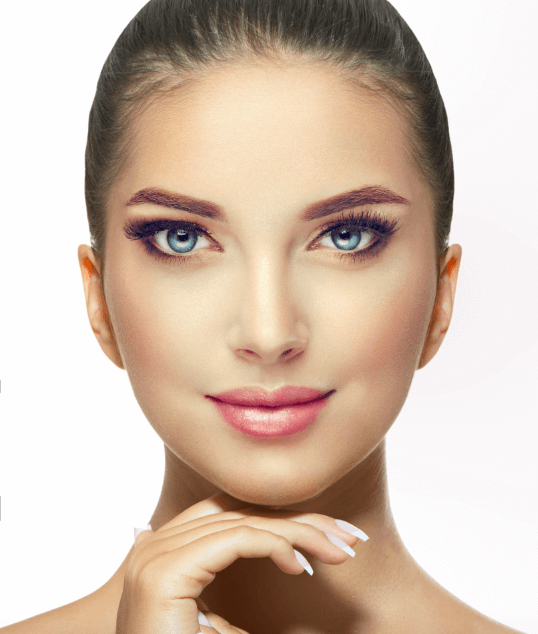
You've now learned a technique used past Photoshop experts that you lot can use to combine images simply by following these eleven steps!
Source: https://backgroundremove.photos/swap-faces-blend-technique-photoshop-cc/
Posted by: dukespring1995.blogspot.com
0 Response to "How To Replace Faces In Photoshop Cc 2018"
Post a Comment